
Point Hudson Marina, Port Townsend, 22-FEB-2025 – Of course, much of what I work on doesn’t show on the to-do list because I didn’t know I needed to work on it, which brings us to the rudder post.
I don’t look at the rudder post much. It sits in a locker in the aft cabin, pretty much minding its own business. The last time I looked at it was in 2019 after we arrived in Hawaii. Someone in the Maxi 95 group correctly pointed out that the reason we had some water in our port locker was a leaking rudder post seal. I had sealed it the year before while on the hard in Boat Haven in Port Townsend. I don’t remember what I did to stop the leak. I expect I just tightened the nut which compressed the packing further.
I don’t know how long it has been leaking. I just fixed the fresh water tank leak, which I need to write about, and noticed how dry it was in the small passage under the aft cabin. I attributed that to no more fresh water leaking from the tank. [The story of replacing the tank will come next.]
A few days later there was water, not much, but it was there. I’ve had Caro Babbo long enough that I generally know where the water is coming from. The rudder post, besides having rust and salt on it, had wet slime. Interesting.
It hadn’t been leaking in a few months, but it was now. Why? We’ve had very blustery weather lately is my guess, enough to push the rudder back and forth breaking the seal the slime had made.
Fixing it is pretty easy, though there are a lot of steps. To make it just two steps: remove everything attached to the rudder post, then remove the cap nut, remove the packing – a line coated in lanolin, which is not hard and isn’t keeping out the water – repack and put it all back together, with just enough tension so that the water doesn’t come back in. But as long as we’re here:

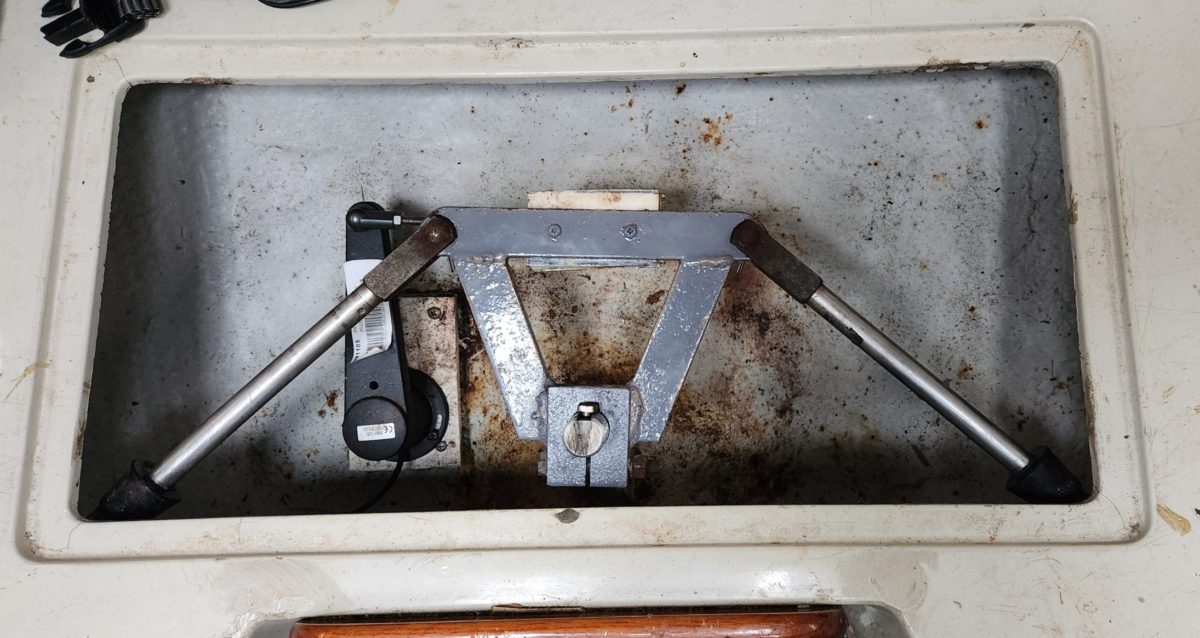
In 2017, I painted the quadrant bright yellow. It had been a rusty red. I wire-wheeled it and painted a few coats on it. It looked good. It has looked good for years.* With the passage of time it has gotten rusty and so it was time. I spray painted last time because we were on the hard and I had a place to spray. This time I used a brush and painted it gray. Why? Because I’m painting the engine.
In the picture, so much has changed that you can see and can’t see. The key in the quadrant has been replaced, as has the bolt – things we did on the police dock in San Diego later that year. There is no rudder sensing device, we replaced that in San Francisco before San Diego. The channel-lock pliers in the picture have seen a whole lot of use: the rubber pieces have worn through. The alcohol stove is gone: we gave that to a Good Will in Homer, AK. The red bag from Brainworks isn’t so red anymore. It is dirty and has rust stains. I have many of these bags. The zipper on one is rusted and can’t be used, other than that, they are still working well.
The original paint on the engine had begun to flake off, revealing the metal, so it’s time to paint it. In the past, I painted accessories different colors. The air filter cover was blue and now, just before I painted it gray as part of the engine painting, it was red . Yanmar’s color is gray. Painting parts of the block sounded like a good idea at first, but nah, it would look like a patchwork. So I bought a can of oil-based paint from Henerey’s hardware and got to work – I couldn’t get high-temp engine paint in anything but a spray can. I spent four hours scraping and cleaning yesterday and today painted everything in less than an hour. It’s all about prep.

The rudder post head is below the water line, which is why it can easily leak. When I take off the cap nut and remove the packing there will be nothing to keep the water from coming in. I came up with two ways of stopping the water, one involved an inner tube from a bicycle, the other stretch repair tape. I couldn’t sleep last night thinking about how much water would spray up, how difficult it would be to stop the water and how long it would take to cut the lanolin line.
When I arrived I tried to trial fit the inner tube and found it was way too small. I walked over the bike shop, but it didn’t open until ten. I figured out a different way of using the inner tube and the backed off the lock nut and removed the cap bolt.

The water dribbled out with the nut removed. At first, it was just a couple of drops but then it increased to a dribble. I didn’t do anything to stop the leak.


I cut two pieces of the line to go around the inside of the nut, installed the nut, tightened it and then broke for an early lunch. Before I left, I wrapped a blue-paper shop towel around the post and looked at it when I returned. It was wet. I tightened the nut, wrapped it in a new paper towel and got painting. The newly gray quadrant was still wet when I was done painting the engine. The paper towel was dry, so I packed up and left.
Tomorrow I’ll see whether it is dry enough to assemble. I’ll assemble the quadrant whether or not the rudder post leaks. It can be tightened without removing the quadrant.
The replacement hoses on the engine sort of fixed the air leak. I still needed to bleed it last time I started the engine, but I’ve retightened the connection so I’ll find out in tomorrow or on Monday after I reassemble the engine. We have guests arriving tomorrow – Friday – so if I don’t get it done, I’ll work on it on Monday.
*Apparently not. This final picture is a picture taken in 2019 in San Diego. It wasn’t pristine then. How much my memory changes things to be what I want them to be.

Whew – and I thought there were a lot of things to repair on an airplane!